Nondestructive Engineering
SOCOTEC performs nondestructive examinations (NDE) as an integral component of its service areas and specialties—failure analysis, engineering design, fitness for service, dispute resolution, structural monitoring and life cycle management. To meet client needs, our experts are available around the clock to support evaluations and assessments
We utilize state-of-the-art methods to categorize asset conditions. Our technical specialists are supported by our engineering expertise to quickly evaluate and assess findings and provide appropriate recommendations to ensure continued safe operation.
Nondestructive Engineering Services
SOCOTEC’s NDE Group has over 50 years of experience in all types of assets—from structures and facilities to infrastructure and equipment. Our nondestructive examination services include remote sensing, ultrasonic flaw detection and thickness surveying, radiography, eddy current, liquid dye-penetrant, magnetic-particle, and visual inspection techniques. To supplement our visual inspection services, SOCOTEC maintains fiber-optic and boroscopic imaging units and complete in-situ metallographic replication equipment. In addition, leak-detection and subsurface locating equipment are also available.
Field Measurements
After an incident, rapid access to reliable data is critical. SOCOTEC is equipped to mobilize globally within 24 hours, deploying a comprehensive range of measurement and recording technologies. Our capabilities include high-speed audio and video recording, strain gauges, accelerometers, pressure transducers, laser measurement systems, and portable PC-based data acquisition systems—enabling accurate, real-time data capture in demanding conditions.
Our team is uniquely qualified to perform both static and dynamic testing in the field and in the laboratory. We offer specialized expertise in residual stress and strain measurements on structures in place, providing valuable insight without disrupting operations. To support structural testing at all scales, SOCOTEC maintains a wide range of hydraulic pumps, rams, and calibrated load cells, allowing us to test components and systems ranging from bolts and cables to subway cars, buildings, and bridges.
Digital Services
As sensing and detection technologies continue to evolve at a breakneck pace, the SOCOTEC staff is always looking for applications that are less intrusive, more reliable and economical. We have employed nets of low-cost, low-power sensors connected to data acquisition nodes via wireless or cellular. We can use drones to perform visual inspections in normally inaccessible areas of a plant. Frequently we introduce cutting-edge technologies to our clients, devising special methodologies and equipment for unique applications.
Wise-Back: Digital Inspection Tool Kit for eTIC
SOCOTEC’s Wise-Back toolkit offers a suite of tools for engineering testing, inspection and certification (ETIC). Wise-Back offers a streamlined, customized approach to field data collection that runs across multiple devices. Among the wide variety of integrated tools are a headset computer, tablet, cameras and video, sensors and measuring devices. It offers real-time voice/video/data communications, allowing remote users access to home office resources and guidance. Home office users have instant access to field data for fast evaluation. Wise-Back features standardized data structures and forms, as well as tools for workflow optimization and task control.

Talk to our experts
"The new Wiseback General Inspection Module (GIM) is a digital toolkit that increases the speed, safety and accuracy of inspections. GIM was an idea conceived at an industry conference, taken from concept, to design, to production of working prototypes - all in the span of 7 months.

Residual Stress Detection and Analysis
Weldment and weld repairs can often result in residual stresses remaining at the completion of the welding process. These can have an effect on the strength of the weldment. SOCOTEC has utilized the ANSYS finite element code to simulate the welding process and heat generated during the weld pass. From simulation, remaining residual stresses can be determined. Conversely, weld process and cooling times can be optimized to reduce induced residual stresses. Analyses can also be supplemented with field measurement when necessary.
Image Processing Methods
SOCOTEC employs advanced imaging tools that can read and translate analog gages, measure vibration, and identify and interpret visible changes to the built environment. Motion amplification camera systems like the RDI Iris M can be used to measure vibrations. Change detection systems identify and interpret minute changes in photographic images—they can read a bank of old-style analog gages and convert the readings into digital data. Digital image correlation systems monitor flaws in concrete and steel—identifying and characterizing cracks before they become dangerous. Photogrammetry is used to create 3-D models of buildings, room interiors, and equipment.
SOCOTEC Laboratories and Large-Scale Testing Facility
In conjunction with our field capabilities, SOCOTEC performs nondestructive examinations and testing at our main Materials Laboratory and Large-Scale Testing Facility in Brooklyn, New York, as well as at the Laboratory Annex in Massachusetts. We offer a full range of services for materials testing and evaluations, component and system evaluations, and simulations for failure/root cause analysis, machine and structural design, troubleshooting and problem-solving. The Brooklyn facility includes a fully equipped machine shop. Low-level irradiated and contaminated components can be evaluated through our Massachusetts annex.
Vibration monitoring using MAC
Vibration monitoring using MAC
Sensors on QB bridge
Sensors on QB bridge
Change Detection System
Change Detection System
Concrete Post-Tension Tendon Condition Monitoring
Concrete Post-Tension Tendon Condition Monitoring
Turbine blades weld undercut
Turbine blades weld undercut
Automated Ultrasonic Testing
Automated Ultrasonic Testing

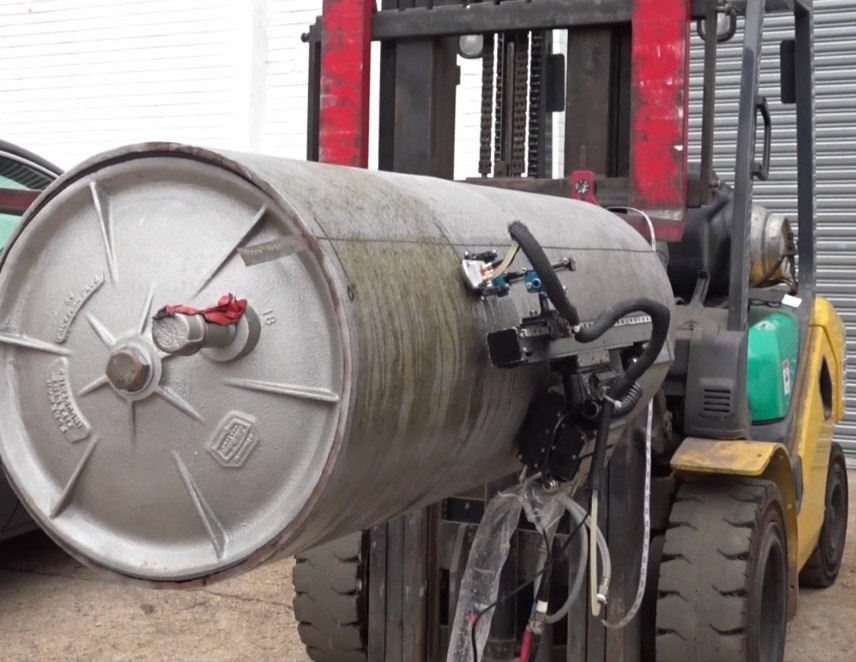
MIC Automated Ultrasonic Testing (AUT) Accuscan In Action
Additional Nondestructive Engineering Services:
- Traditional NDE: UT (including automated UT and phased array), RT, MT, PT
- Sensor nets/data analysis; wi-fi and cellular connectivity
- Advanced NDE and data processing techniques
- Imaging & Video—videoprobe, drone camera, Digital Image Correlation, Change Detection System, Motion Amplification Cameras, photogrammetry, PAUT image analysis
- 3D Laser Scanning
- Certified Weld Inspection
- Research & Development
- AWS Certification
- Wise-Back digital inspection system
Want to learn more about our Nondestructive Engineering and Testing services?


